novelty automation london by hunkin

I had the very great privilege of being invited to an opening party at Novely Automation, in Holborn, London. The small former gallery was filled to bursting with friends and well wishers so it was quite difficult to take pictures as you’d only see throngs of people and not the machines… well that is until later when it thinned out but I’d had a couple too many of Hunkin’s beer by then and forgot, so you’ll have to go along yourself to get the real feel of the place. Tokens are sold from a counter. I’d recommend taking at least £10 along to buy tokens to get the best deal as tokens cost less the more you buy.

IMG_0764

Jonty Plays “My Nuke” a favourite machine borrowed from Southwold Pier

The arcade features some replicas of popular machines from the very popular Hunkin arcade “The Under The Pier Show” at Southwold Pier in Suffolk. Replicas created for the new arcade including the “Expressive Photo Booth” which is a Passport Photo Booth with mechanical additions to create more expressive photos of the subject and “Test Your Nerve” a horrifying experience likely to induce post-traumatic-stress in postmen. You can find a full list of the machines here.

IMG_0786

Hunkin tweaks Iain Sharps “Cycle Pong”

I went along with some friends from the London Hackspace, one, an accountant, especially wanted to play an excellent new machine “Money Laundering” where players attempt to shovel millions of pounds in bonuses through the top of their building whilst avoiding the watchful eyes of the regulators the FCA.

IMG_0755

Russ on “Money Laundering”

I have no doubt that Hunkin’s new arcade will become one of those delightful discoverable “secret” bits of London. It’s walking distance from Kings Cross/St Pancras and can easily add to a day trip. The arcade is open Wednesday to Saturday 11am to 6pm and till 7pm on Thursday but not on Sundays.

You can find an excellent write-up of the moving in process in Spitalfields Life by @thegentleauthor or for opening times and info on the arcade novelty-automation.com or follow @novautomation on twitter.

sticking plaster shoot out

What? Yes a product review of sticking plasters, that is to say plasters you put on yourself when you’ve cut yourself, hopefully by accident. Why? Well lately, what with Hackspace, kite flying (it’s the line) and the allotment I’ve cut myself or made a big blister a little more than once. I’ve not been terribly impressed with sticking plasters. They tend to fall off. I am a bit of a sticky plaster fiddler I’ll admit, un-sticking and then re-sticking them, which they can’t really take. I like my plasters tight and non-moving. I tend to un-stick and re-stick when they start to peal away… sometimes this is almost as soon as you put one on. Not all plasters and made equal.

IMG_7622

I want to regularly carry some plasters about with me. I want to be sure that they’ll do what I want when I need them. What I need is for them to not fall off my skin after a few seconds. Our contenders on this test (based on what I could find in the places I looked) are from left to right of the above picture:

1. ELASTOPLAST – EXTRA TOUGH Pack of 12 Priced £2.28 (or 19p each) Fabric plaster pack purchased from Wilkinsons.

2. WILKO PLASTERS – FABRIC PLASERS Pack of 40 Priced £1.07 (or 2p each) Fabric plaster variety (various size) pack purchased from Wilkinsons.

3. BOOTS FABRIC Pack of 20 Priced £1.69 (or 9.5p each) Fabric plaster pack purchased from Boots the Chemist Ltd.

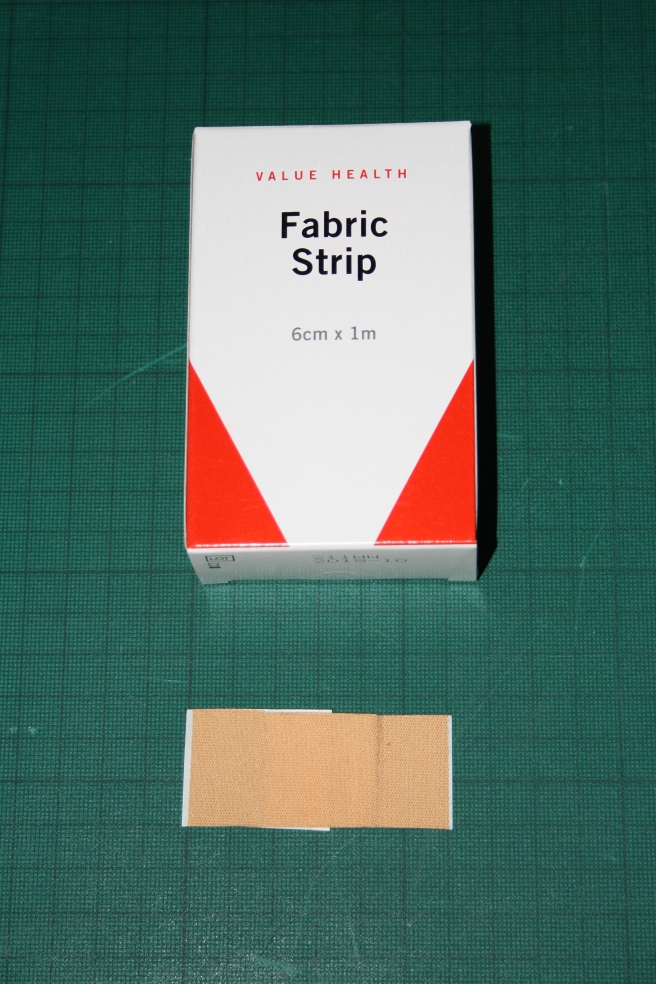
4. Unbranded FABRIC STRIP  1m roll Priced £0.49 (or 24p equivelent size plaster) Fabric plaster strip for cutting to size purchased from Boots the Chemist Ltd.

5. HANDY – MINI FIRST AID KIT  Pack of 25 plasters and dressings Priced £1 (or 4p each) Dressing and plaster pack purchased from Tesco Home.

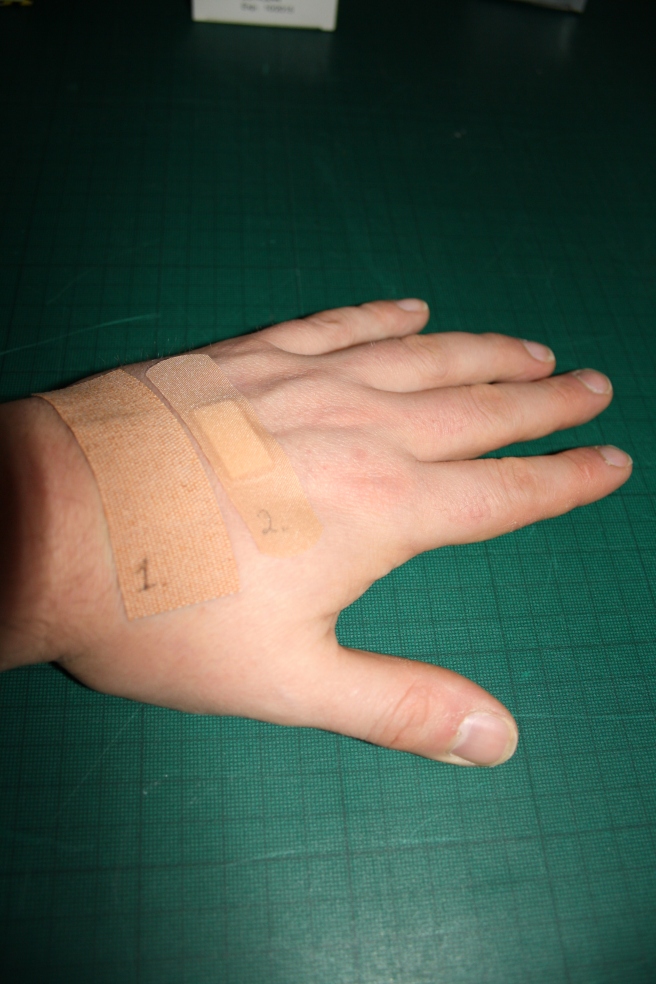
First I cleaned the back of my hands with an alcohol medical wipe and let them properly dry. I then applied one of each of the plasters of about an equivlent size to the backs of my hands. I also numbered them as above.

IMG_7643IMG_7644

There isn’t a lot to say about application. All the plasters came in their own little packaging with the exception of the 4. the Fabric Roll which I cut to a similar size to the others. I’m not sure what a nurse or the medical world says about sticking plasters and letting air in or keeping the plasters hygenically sealed from the world… so I looked it up. NHS direct just says to stem the bleeding before applying a sterile, adhesive dressing. I’m not sure how much risk there is from the fabric roll, I assume that the gauze part which is covered up is sterile and not at that much risk. You can find out more yourself at these links, NHS direct on First Aid kits and NHS direct on cuts and grazes.

I applied the plasters at about 10:45 in the morning and continued my normal work and a trip into town and removed them at about 14:00.

IMG_7629

1. The ELASTOPLAST felt very secure for the whole test really wasn’t going anywhere. It wasn’t especially hard to remove but did pull a little at my skin. The skin below the plaster did feel a bit clammy and sweaty so I’m not sure how good that would be for a cut. One thing I really liked was that it maintained it’s look, never peeling at the edges or starting to come away. It didn’t look dirty even at the end of the test.

IMG_7630

2. The Wilko fabirc plaser was frankly next to useless. I had high hopes for this Wilko own brand hoping to be able to say something like “Elastoplast wasn’t even as good as Wilkos” but that just isn’t true. The plaster started to lift almost instantly and never felt tight or properly adheared to my skin. IMG_7646

It was so loose and flopsy after about an hour that it just fell off. The worst of it was that it actually left an adhesive mark on my skin. Now it might just be that I have a weird skin type or something but for me this plaster was a waste of money and frankly useless.

IMG_7632

3.The BOOTS FABRIC did okay. I put it in a tricky possition near my knuckles on my right hand so before the end of the test it started to peel a little bit at the knuckle end. Generally though it compared well with the Elastoplast and whipped the Wilko plaser. It was easy to remove too and did not leave much adhesive on my skin. It did start to look tatty and dirty fairly quickly

IMG_7634

4. The FABRIC STRIP mentally feels like a NO FUSS plaser, the sort of thing I might imagine a rough person would say “This is all you need, you can’t beat fabric strip, non of your fancy indivdually wrapped plasers!” and it does fit a variety of situations. The downside is that you need scissors or a very sharp knife to cut a bit off. Of course you could cut some up ahead of time and pop them in a little baggy. It stuck well and has the open sides so has the advantage that it will let a little bit of air in that “might” be better for the cut to help it dry out. Obviously it doesn’t really stop it getting wet and on open skin like and arm or the palm of your hand it doesn’t really apply any pressure to your cut.

IMG_7637

5. The “Keep it Handy” Mini First Aid kit was a bit of an outsider. It was in amoungst those £1/£2 boxes of tat you get these days in some supermarkets, usually with glasses mending kits, a spare set of sink plugs, a duster that sort of thing. I was really surprised that the plaster in this kit out shon the Wilko’s own brand plaster and stayed in place till the end of the trial. For a handy little kit to thow in the glove box this kit is ok. This was a surprise.

So it was a bit mad of me to do this but I though, why not! When I was out and about in town I bumped into some old work colleagues who definately noticed the numbered plasters (at this point 1 on my left and 3 on my right) but didn’t mention them. They probably think I’m a druggy now. I’d probably rather they think that than me having to explain I’m the sort of bloke who thinks doing a sticky-plaster review is worth doing.

feeling guilty about light-night

This should be a post about the amazing, Make Magazine and Hack-a-day worthy project I concocted for Nottingham City’s “Light Night” on the last night of February (and the last of winter) 2014. It’s not, it’s a promise to do SOMETHING next year… the true horror of it is I said the exact same thing last year. In 2013 I put a bit board of light sensitive paint on my back and had kids “draw” on it with a laser pointer. This was really boring as I had to stand facing away from people for long periods of time… weirdly everyone else thought it was great.

IMG_6357

Light night is superb. It’s one night you can head into the city and the drunken stage and hen do’s are out numbered by families enjoying the spectacle. This year for a quite reasonable £4 (with advance ticket) the main trust of the city council’s effort was contained in the castle ground (previous years it’s been in the market square) but there was plenty of fringe activity with local businesses getting in on the festival spirit.

IMG_6386

The streets were thronging with carnival like activity. Sneinton Market had the wonderful dancing fountains running full tilt, a food market, live music, costumed folk and a roller skating rink. All the way up Hockley there were little activities going on, a projectionist-artist, a drumming circle and loads of other little things.

IMG_6455

Our party included Michelle who had decorated herself and bike with Electro Luminescent wire (EL Wire) which draw many appreciative comments including one kid who said it was “Awesome!” After a good look about we ducked into the mulled cider bar for a warming beverage. Next year I’ll do something awesome… probably.

IMG_6372

un-hackable masterplug powerblock

I have this usb and three pin mains extension lead with surge protection from Masterplug called the Powerblock. It’s great because it has 4 sockets and 2 usb sockets and is perfect for getting all my mobile devises charged up next to me in bed. I have a bunch of multi-ended USB cables and can charge anything off it properly. My work Blackberry Curve and iPhone 4s can be picky about what you plug them into. I also have a kindle, August Bluetooth speaker, iPod touch and things like GoPro Hero 2 and MyFi WiFi hub to charge on occasion.

The downside is that the powerbloc has two very bright LED lights to show it’s ON and it’s SURGE PROTECTING. The design of the on light hints that the original design might have included an on/off button… put it this way it looks like it should be an on/off button and I’d put money on not being the only person who’s given it a poke to see if it’ll toggle. These lights don’t go off and some people can’t sleep if there is light in the room. I should add that there is a blue LED and a bright white LED. I did a Google search and it’s a commonly asked thing about turning them off or a commonly feedback thing that it’s a P.I.T.A you can’t switch them off.

IMG_6121

IMG_6139

I’m supposed to be a “hacker” and as such I’m supposed to pop this thing open and fix the problem right? Well it turns out that the Powerblock can not be opened without breaking it (as far as I can tell). Once I’d popped the 4 screws out there was no way for me to pry open the case without it breaking the plastic at the join. I think this is likely to be because Masterplug offer a lifetime guarantee on the product. In a way I suppose that it’s fair enough they make it so you can’t get in and mess about IF they are prepared to honor the guarantee. By breaking the sticker over the screws I’ve very likely invalidated mine though.

IMG_6142

IMG_6146

Anyway I ended up doing a much less technical hack than I planned. Reaching into the fridge for another pack of sugru did the trick, but it bugs me those LEDs are still burning away below the silicon. I took all the pictures to do a tear down of taking the LEDs out instead here is a sugru hack… hardly a special one. Foiled by plastic!

the vileda cleaning robot

I was knocking about in B&Q whilst waiting for my partner to finished work when I stumbled on a display area for the Vileda Cleaning Robot which to me looks a lot like an iRobot Roomba in that it’s round and has a big bumper around half of it’s radius. I went over to the display and switched that machine on and watched it bang about in it’s little display arena.  Once I saw how it found an edge then moved along the edge cleaning it. The decision to buy was entirely impulse, neither me or my partner want to vacuum clean very much and mostly have tiled or very short pile carpet floors. The cleaning robot is made for hard floors primarily. Also had the machine been any more expensive I’d not have considered it really. I’ve fancied a Roomba for a while but always felt I couldn’t justify the £300+ prices.

IMG_6157

IMG_6158

The cleaning robot is quite noisy, but no nosier than a vacuum cleaner (which of course is what it is). Whilst the vacuum cleaner part of the cleaning robot isn’t large or terribly powerful, the noise of the motors moving the wheels adds to the din. Unlike Roomba, the Vileda cleaning robot doesn’t have a base station and the controls are very simple. ON/OFF button and an S, M and L button. Press S for small rooms, M for medium rooms and L for Larger rooms. The cleaning robot then runs for a fixed amount of time so you can’t be sure it’s done the whole room if you leave it alone.

IMG_6166

IMG_6160

It has a dust and bit holder about the size of two SNES cartridges stacked one on the other. This is always full of stuff after each run and I see this as a good sign of it’s hoovering prowess, well that and that you can see the floor has been hoovered. In truth I (have chosen to) spend as long pulling my partners hair out of it and taking it to bits as I would have done vacuuming the house, but lets face it… I much prefer maintaining a robot to vacuuming the house.

IMG_6155

IMG_6174

Above and in the post I’ve included pictures of the “getting into the edges” brush, the “cliff sensors” to detect drops, a sensor on the top at the front for something and other stuff you can work out yourself. I’d love one of these to also do mopping. Here is a little video of mine at work.

A quick search online didn’t show me where to get spares, though I suppose I could email Vileda UK. Here is the item on diy.com